Description
Pesola Multifunctional Cap For M5 Pressure Rod
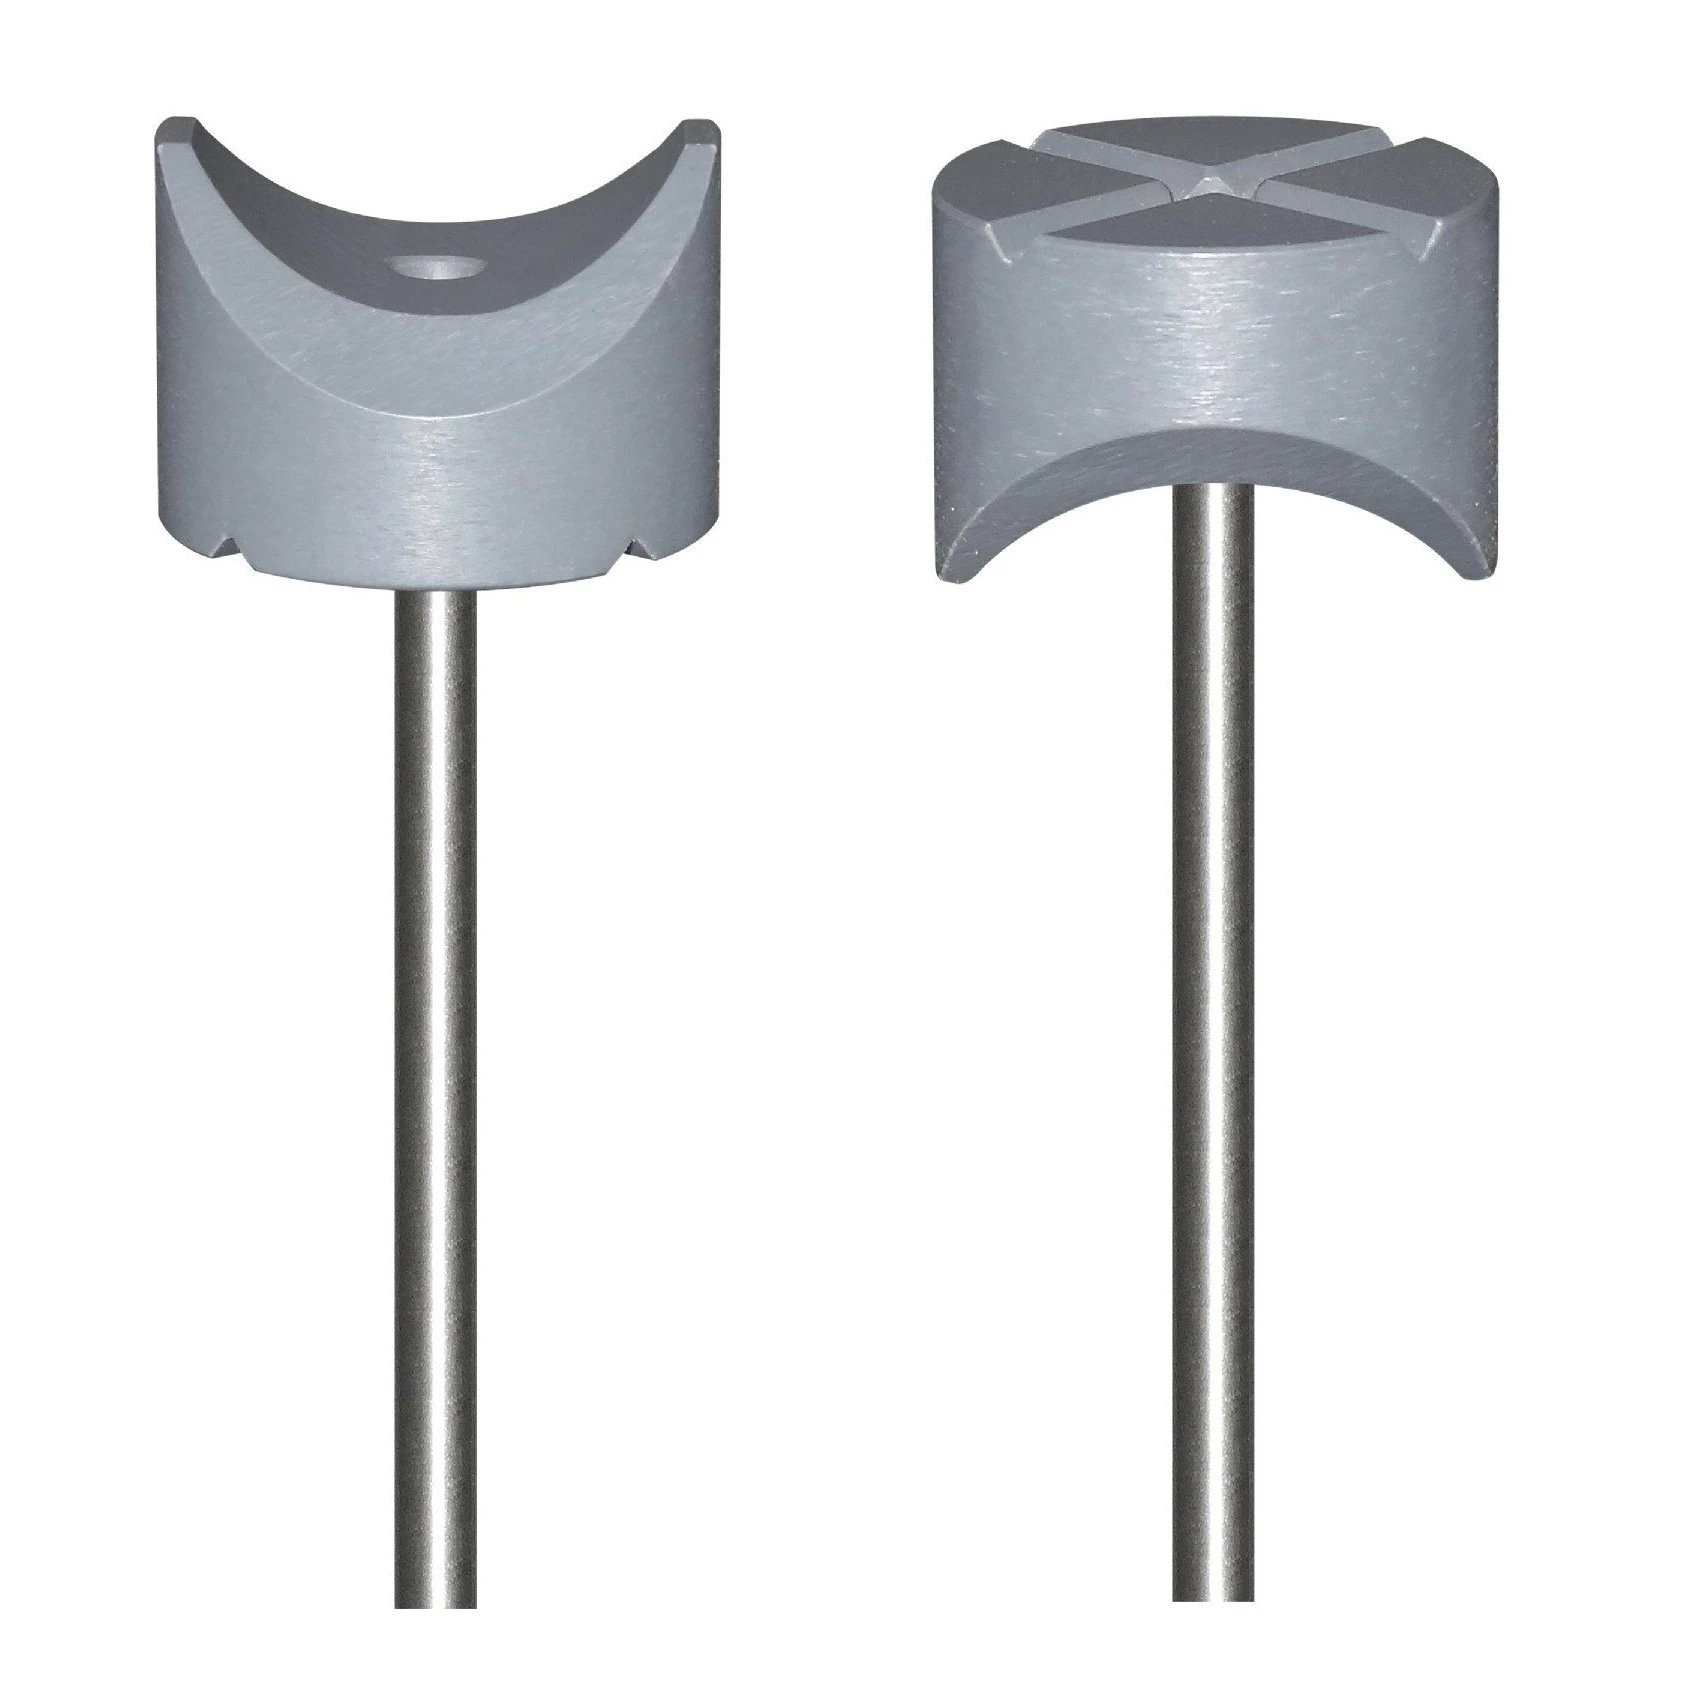
Depending on the surface and shape of the measuring object, select one of the 2 possible ways (A / B) of assembly and screw on the Multi-functional cap for pressure rod M5‚ accordingly on the pressure rod of the pressure set 8.004. It is also easy to adapt the cap by e.g. grinding down one tip or in order to protect a measuring surface to glue a self adhesive protector on the flat side of the cap (2 images).
A: Concave rounding with two canted sides pointing at the measuring object
- Is designed to measure pressure forces on round objects without slipping off.
- The 2 edges, creating a 90° angle, serve to measure pressure forces in reentrant edges.
Application
- Pressure measurement on bars of panic- or fire doors (emergency exits). 
- Measure opening forces of door handles. 
- Closing forces of fire doors, windows, handles frames etc.
B: Round, flat side with two v-shaped recesses pointing at the measuring object
- Suitable to measure the pressure forces on flat objects. 
- The two v-shaped recesses serve to measure pressure forces on projecting edges.
Note for best measuring results
In general PESOLA Scales measure very precisely. However the way of operation for maximum forces measurement may have a remarkable influence on the result. Please observe the following:
- Transform the scale for pressure measurement.
- Screw on the ‚Multi-functional cap for pressure rod M5, the suitable size ahead. Do not fully tighten the cap. This way you can slightly rotate it in order to fit the round or square object to be measured.
- Hold the scale in measuring position, without executing any force yet and adjust the zero position with the tare screw.
- Move the drag pointer towards zero.
- Hold the scale on the radial grip, the other hand holding the opposite end of the tube, stabilizing it. Do not touch or hinder the drag pointer during measurement.
- Start the pressure measurement. Keep the axis of the scale rectangular to the measuring object in order to minimize a possible inner friction.
- Slowly and continuously increase the pressure. It is important to maintain the speed of axial feed, to get comparable results. e.g. very fast axial feed => higher measuring results, e.g. very slow axial feed => lower measuring results
We therefore recommend to build up the measuring force at an average constant speed: Therefore count the seconds: 21 ...... 22 (while you raise the force by 1/5 of the total scales capacity or preferably an even division of the graduation) ....... 23 (raise the force by a further step of the same length within another second) .......... 24 (and so forth)‚ until the measuring object moves back or clicks into place while the scale simultaneously slightly springs back. At this moment of the maximum force the drag pointer stands still). - Reduce the force back to zero, not touching the drag pointer.
- Read the maximum force of measurement at the upper edge of the drag pointer.
- Repeat the measurement with the same parameters for 3 times and document the values.
- The arithmetic average of the 3 values provides reliable result.


